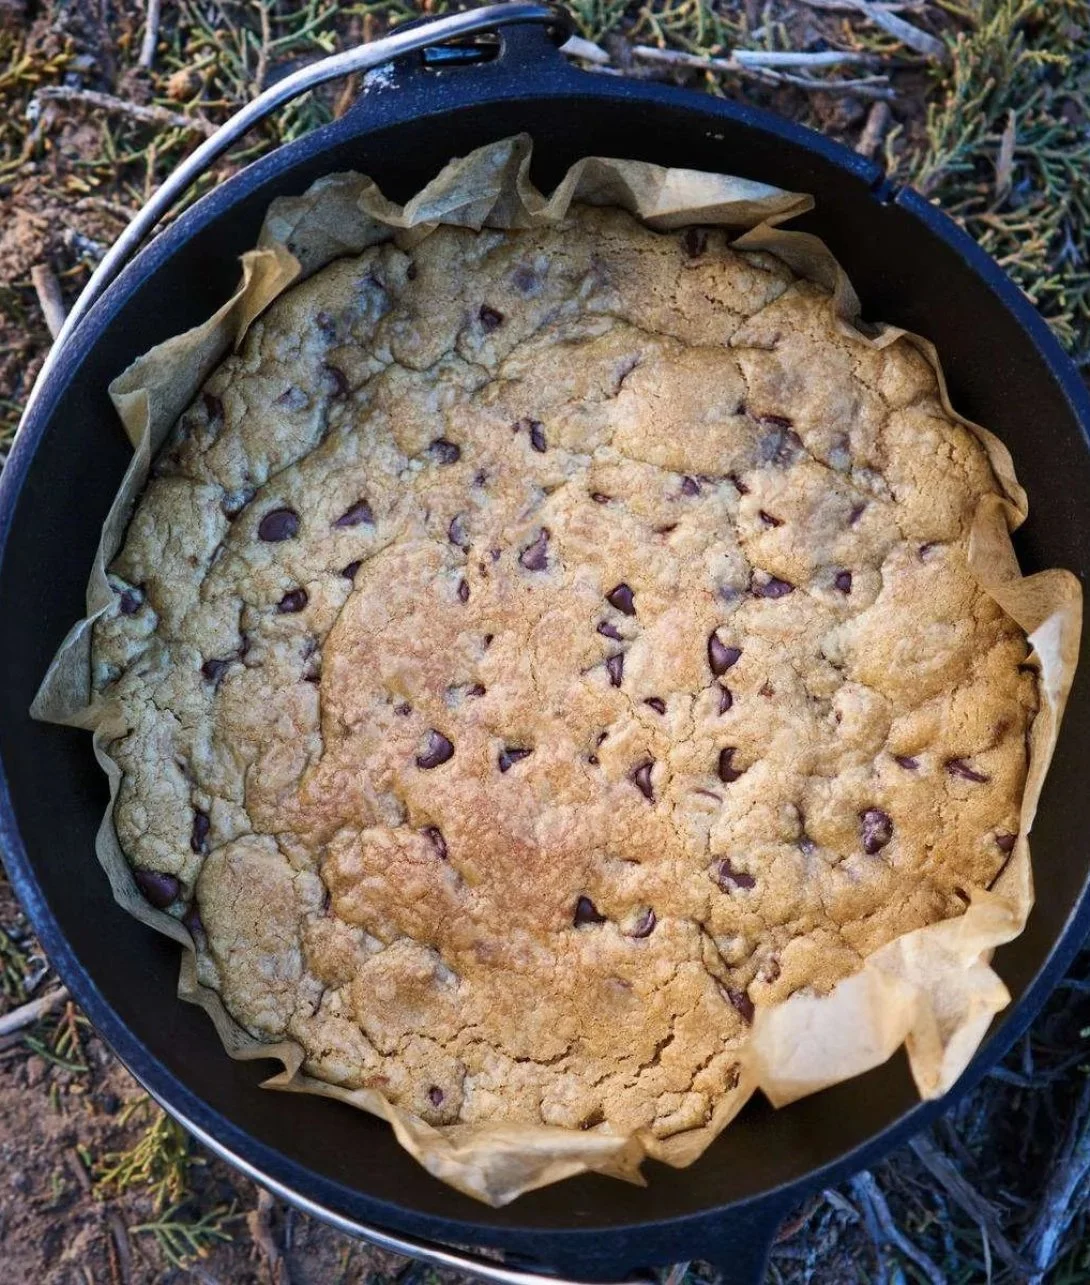
There’s something magical about baking that brings back fond memories of my childhood—particularly the unforgettable smell of freshly baked cookies wafting through my grandmother’s house. I remember standing on my tiptoes, eagerly waiting for the first batch to come out of the oven. As she would set the warm, gooey chocolate chip cookies on the counter, I would grab one before it even had a chance to cool, the chocolate still melty and inviting. Today, I’m recreating that nostalgic experience with a twist: Dutch Oven Chocolate Chip Cookie Bars. These bars deliver all the joy of traditional cookies with a unique, rustic charm that is perfect for sharing—or sneaking bites from the pan!
Recipe Timing
- Prep Duration: 10 minutes
- Active Cooking: 30 minutes
- Total Duration: 40 minutes
- Portion Size: 12 bars
- Complexity: Simple
Nutritional Recipe
- Calories per portion: 250
- Protein: 3g
- Carbs: 32g
- Fats: 13g
- Fiber: 1g
- Sugars: 18g
- Sodium: 160mg
Why You’ll Love This Dutch Oven Chocolate Chip Cookie Bars
If you’re like me and find joy in a gooey chocolate chip cookie, these Dutch Oven Cookie Bars elevate that experience. They are easy to prepare and cook evenly, creating delightful edges and a soft, chewy center. The Dutch oven isn’t just for stews and roasts—it’s a surprisingly perfect baking vessel for creating these comforting bars. Plus, the simplicity of preparing them all in one pot means less cleanup and more time enjoying the delicious results!
The Complete Cooking Journey
Let’s take a step-by-step journey through this charming recipe. We’re going to start with some easy prep work, mix together a cozy dough, and then let the magic happen as these bars bake lovingly in a Dutch oven. Grab your apron, and let’s do this!
Ingredients:
- 2 cups all-purpose flour
- 1 teaspoon baking soda
- 1/2 teaspoon salt
- 1 cup unsalted butter, softened
- 1 cup brown sugar
- 1/2 cup granulated sugar
- 2 large eggs
- 2 teaspoons vanilla extract
- 2 cups chocolate chips
Method:
Step 1: Preheating Your Dutch Oven
Start by preheating your Dutch oven over low heat. This gentle warmth is ideal for producing evenly cooked cookie bars. Don’t forget to grease the bottom and sides with non-stick spray or a little butter to prevent sticking!
Step 2: Mixing Your Dry Ingredients
In a medium bowl, whisk together the all-purpose flour, baking soda, and salt until well combined. This blend will give your cookie bars structure and a delightful lift.
Step 3: Creaming the Butters and Sugars
In a separate large bowl, cream the softened butter with both the brown and granulated sugar. Mix until the mixture becomes smooth and fluffy, which helps create a perfectly rich flavor.
Step 4: Adding Eggs and Vanilla
Next, crack in the eggs and pour in the vanilla extract. Beat this mixture well until completely blended. The warmth of the Dutch oven is coming to life, and your mixture will start to smell wonderful!
Step 5: Incorporating the Dry Ingredients
Gradually add in your dry ingredients to the wet mixture, stirring until just combined. You want to avoid overmixing here, as it can lead to denser bars. Scooping, folding, and mixing with love will get you there!
Step 6: Stirring in the Chocolate Chips
Now, it’s time for the star of the show: the chocolate chips! Gently fold them into the dough, spreading that chocolaty goodness throughout.
Step 7: Spreading the Cookie Dough
Pour the cookie dough into the prepared Dutch oven and spread it evenly across the bottom. This even layer is key for achieving beautifully baked bars with crunchy edges!
Step 8: Baking to Perfection
Cover the Dutch oven with its lid and let the magic happen for about 30 minutes on low heat. Keep an eye on the edges; they should be turning golden brown while the center firms up!
Step 9: Cooling and Cutting into Bars
Once time is up, remove the Dutch oven from heat and allow it to cool for a few minutes. This slight cooling will give you cookie bars that hold together nicely when you cut into them!
Serving Suggestions & Pairings
These Dutch Oven Chocolate Chip Cookie Bars are best served slightly warm with a scoop of vanilla ice cream on the side or drizzled with chocolate sauce. You could also enjoy them with a glass of cold milk or a warm cup of coffee—the perfect companion for a cozy dessert!
Storage & Leftovers Guide
Store these cookie bars in an airtight container at room temperature for up to 5 days. For longer storage, feel free to freeze them. Just make sure to wrap them tightly in plastic wrap and place them in a freezer bag. They can last for up to 3 months in the freezer—perfect for whenever that sweet tooth strikes!
Kitchen Wisdom & Success Tips
- Make sure your Butter is softened for easier mixing and better texture.
- Take care not to overmix the dough after adding in the dry ingredients.
- Adjust the cooking time if you’re using a larger or smaller Dutch oven to ensure even baking.
- Add your favorite nuts or dried fruits for an extra flavor dimension.
Flavor Variations & Adaptations
Feeling adventurous? Try swapping out half of the chocolate chips for peanut butter chips or white chocolate for a delightful twist. For a festive touch, add some cinnamon or a sprinkle of sea salt on top before baking.
Reader Questions & Solutions
- Can I use whole wheat flour?
Yes, but it may change the texture slightly. Try using half whole wheat and half all-purpose for a healthier option! - What if I don’t have a Dutch oven?
You can bake these in a regular oven-safe dish. Just adjust the baking time accordingly, and keep an eye on them! - How do I know when they’re done?
The edges will be golden brown, and a toothpick inserted in the center should come out with a few moist crumbs. - Can I make these ahead of time?
Absolutely! You can prepare the dough ahead of time and refrigerate it overnight. Just allow it to come to room temp before cooking. - What’s the best way to cut them into bars?
A sharp knife works best! For clean cuts, let the bars cool completely before slicing.
Wrapping Up
Cooking is more than just a chore; it’s a way to connect with our past, create lasting memories, and share our happiness with friends and family. These Dutch Oven Chocolate Chip Cookie Bars embody that spirit, providing a warm, nostalgic treat that everyone will love. So grab those ingredients, turn on the heat, and embark on a delicious adventure that will fill your home with sweet aromas and your heart with joy! Happy baking!
Print
Dutch Oven Chocolate Chip Cookie Bars
- Total Time: 40 minutes
- Yield: 12 bars 1x
- Diet: Vegetarian
Description
These Dutch Oven Chocolate Chip Cookie Bars deliver all the joy of traditional cookies with a unique, rustic charm that is perfect for sharing.
Ingredients
- 2 cups all-purpose flour
- 1 teaspoon baking soda
- 1/2 teaspoon salt
- 1 cup unsalted butter, softened
- 1 cup brown sugar
- 1/2 cup granulated sugar
- 2 large eggs
- 2 teaspoons vanilla extract
- 2 cups chocolate chips
Instructions
- Preheat your Dutch oven over low heat and grease with non-stick spray or butter.
- Whisk together flour, baking soda, and salt in a medium bowl.
- Cream the softened butter with both sugars until smooth and fluffy.
- Add the eggs and vanilla, mixing until well combined.
- Gradually stir in the dry ingredients until just combined.
- Fold in the chocolate chips gently.
- Pour the dough into the prepared Dutch oven and spread evenly.
- Cover it with the lid and bake for about 30 minutes.
- Remove from heat, cool briefly, then cut into bars.
Notes
Store in an airtight container for up to 5 days or freeze for up to 3 months.
- Prep Time: 10 minutes
- Cook Time: 30 minutes
- Category: Dessert
- Method: Baking
- Cuisine: American
Nutrition
- Serving Size: 1 bar
- Calories: 250
- Sugar: 18g
- Sodium: 160mg
- Fat: 13g
- Saturated Fat: 8g
- Unsaturated Fat: 4g
- Trans Fat: 0g
- Carbohydrates: 32g
- Fiber: 1g
- Protein: 3g
- Cholesterol: 30mg