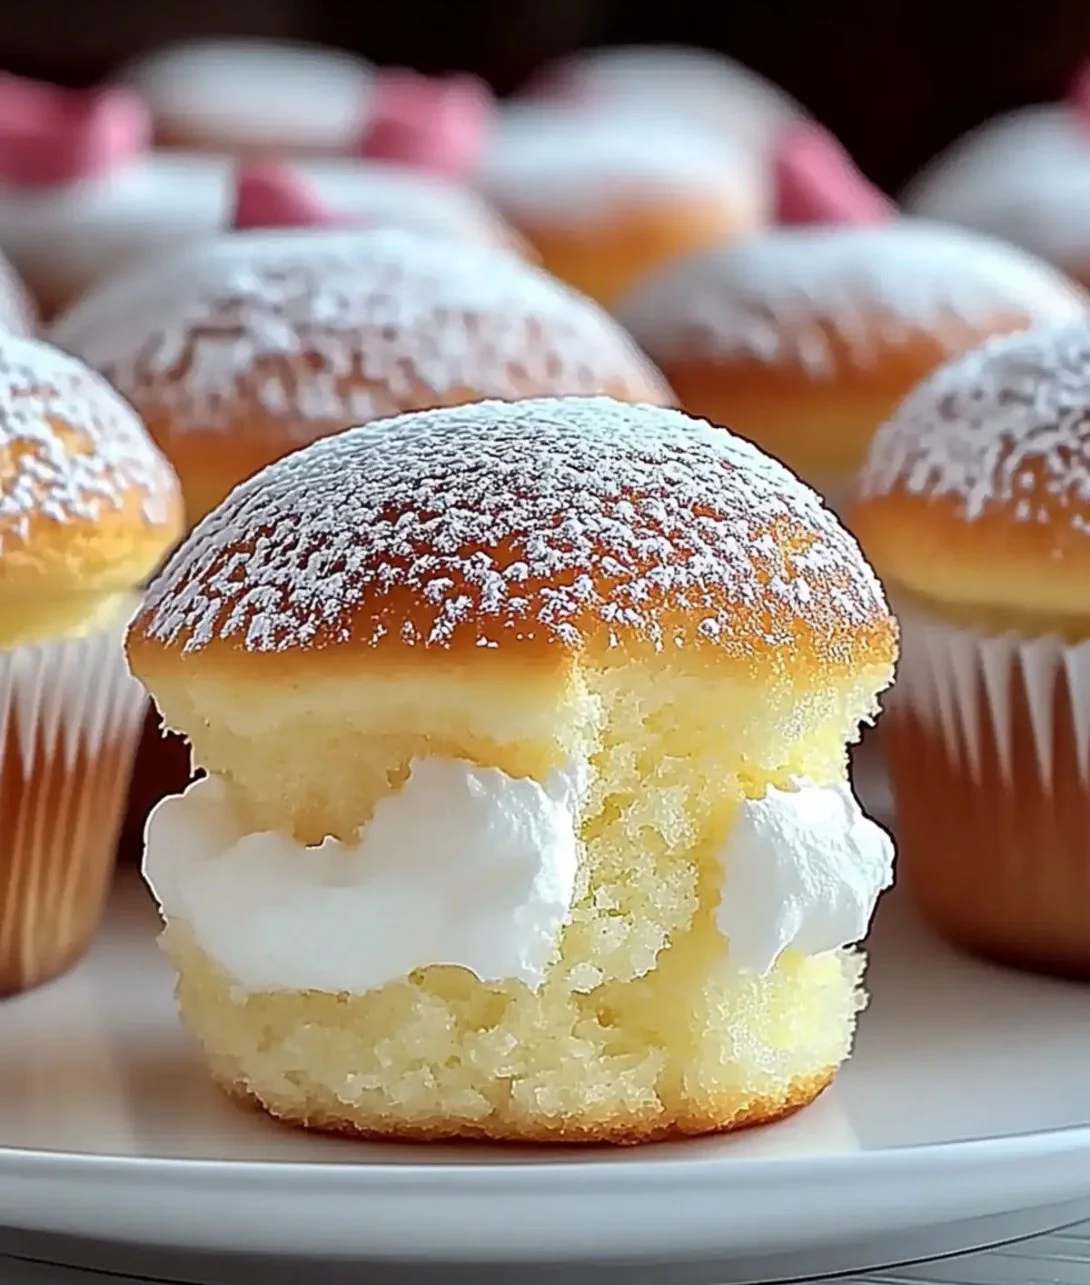
There’s something truly enchanting about desserts that seem to defy gravity, and the Fluffy Japanese Cotton Cheesecake is a prime example. I remember the first time I tried this ethereal treat at a quaint café in Japan. It was soft, jiggly, and almost like eating a cloud. With each bite, I was transported to a dreamy realm where dessert and comfort coexist. After much experimentation in my own kitchen, I’ve finally nailed this recipe, and trust me, it’s worth every minute spent. Allow me to share my culinary journey with you and inspire you to whip up this delightful cheesecake that’s as pleasing to the eye as it is to the palate.
Recipe Timing
- Prep Duration: 20 minutes
- Active Cooking: 30 minutes
- Total Duration: 2 hours 50 minutes (including cooling time)
- Portion Size: Serves 6-8
- Complexity: Moderate
Nutritional Recipe
- Calories per portion: Approximately 210
- Protein: 5g per serving
- Carbs: 24g per serving
- Fats: 10g per serving
- Fiber: 0g per serving
- Sugars: 8g per serving
- Sodium: 115mg per serving
Why You’ll Love This Fluffy Japanese Cotton Cheesecake
This cheesecake isn’t your ordinary dessert. Its unique texture is a marvel; it’s light as air yet rich enough to satisfy your sweet tooth. The subtle tang of cream cheese is beautifully balanced with the sweetness, while the lemon juice adds a hint of brightness that elevates the flavors. Trust me, you’ll be charmed by its silky smoothness and fluffy consistency, making it the perfect end to any meal or simply a delightful afternoon treat.
The Complete Cooking Journey
Picture this: You’re in your kitchen, creating something new and exciting. The aroma of melting butter and cream cheese fills the air, and the sound of whisking egg whites brings a rhythm to your cooking. As you fold in the fluffy mixture, you’ll feel a sense of accomplishment wash over you. Finally, as the golden cake emerges from the oven, you’ll be filled with anticipation. Wait until you’ve dusted it with powdered sugar; it’s a moment you’ll want to savor!
Ingredients
- 3 large eggs
- 200g cream cheese
- 50g unsalted butter
- 100ml milk
- 1/4 cup sugar
- 1/2 cup all-purpose flour
- 1 tablespoon cornstarch
- 1/4 teaspoon salt
- 1/4 teaspoon lemon juice
- Powdered sugar for dusting
Method
Step 1: Preheat the Oven and Prepare the Pan
Preheat the oven to 170°C (340°F) and prepare a 7-inch round cake pan by lining it with parchment paper. This step is crucial for preventing the cake from sticking and ensuring a smooth release.
Step 2: Melt the Cream Cheese and Butter
In a mixing bowl, melt the cream cheese and butter together over a water bath or in the microwave, stirring until smooth. This combination creates a creamy base for our cheesecake.
Step 3: Mix in the Milk
Add the milk to the cream cheese mixture and mix well, forming a luscious liquid that will anchor the texture of the cake.
Step 4: Combine Egg Yolks
Separate the egg whites and yolks. Stir the egg yolks into the cream cheese mixture one at a time, mixing thoroughly after each addition. This will enrich the batter and add depth to the flavor.
Step 5: Sift the Dry Ingredients
Sift together the flour, cornstarch, and salt, then add to the cream cheese mixture, mixing until smooth. Sifting helps ensure a light texture, avoiding lumps in your batter.
Step 6: Whip the Egg Whites
In a separate bowl, beat the egg whites with the lemon juice until soft peaks form. Gradually add the sugar and continue beating until stiff peaks form. This is the magic element that will make the cake rise and become fluffy.
Step 7: Fold in the Egg Whites
Gently fold the egg whites into the cream cheese batter in three increments, being careful not to deflate the mixture. This step is all about maintaining that lightness you’ve just created.
Step 8: Prepare for Baking
Pour the batter into the prepared cake pan and smooth the top. It’s time for this beauty to go into the oven!
Step 9: Create a Water Bath
Place the cake pan in a larger baking dish and fill the dish with hot water halfway up the sides of the cake pan (water bath). This technique helps regulate the temperature during baking, yielding a silky texture.
Step 10: Bake the Cake
Bake for 25-30 minutes until the top is golden and a toothpick inserted comes out clean. The aroma will envelop your kitchen, making it hard to contain your excitement.
Step 11: Let it Rest in the Oven
Turn off the oven and leave the cake inside for an additional 15 minutes. This gradual cooling prevents cracking and helps maintain that fluffy texture.
Step 12: Cool and Serve
Remove from the oven, let cool, and then refrigerate for at least two hours before serving. Dust with powdered sugar before serving to add a touch of elegance.
Serving Suggestions & Pairings
Serve this fluffy cheesecake on its own, or for an extra treat, pair it with a fruit compote or fresh berries. A dollop of whipped cream or a scoop of vanilla ice cream elevates it even further. It’s perfect for birthdays, tea parties, or simply as a weekend indulgence.
Storage & Leftovers Guide
Store any leftovers in an airtight container in the fridge for up to 3 days. This cheesecake can also be frozen for up to a month; just make sure to wrap it tightly to prevent freezer burn. Thaw in the fridge overnight for the best results.
Kitchen Wisdom & Success Tips
- Ensure that your cream cheese and butter are at room temperature for easier mixing.
- Be gentle when folding the egg whites; the goal is to keep the air inside the mixture.
- For additional flavor, consider adding a splash of vanilla extract to the cream cheese mixture.
Flavor Variations & Adaptations
Feel free to experiment! Add a hint of matcha for a green tea flavor or incorporate lemon zest for a more pronounced citrus taste. You can also try using different types of cheese for different flavor profiles.
Reader Questions & Solutions
-
Why did my cheesecake sink?
- This could be due to underbaking or not whipping the egg whites sufficiently. Just ensure they are whipped to stiff peaks before folding them in.
-
What should I do if my cheesecake cracks?
- It may have cooled too quickly. To prevent this, let it rest in the oven with the door ajar before removing.
-
Can I use low-fat cream cheese?
- While you can, full-fat will yield the best results in terms of creaminess and texture.
-
What if I don’t have a water bath setup?
- You can bake it without one, but it may result in a denser cake. Alternatively, consider adding a pan of water to your oven to create humidity.
-
How do I know if my cheesecake is done?
- The top should be golden, and a toothpick inserted should come out clean. It should have a slight jiggle in the center when you shake it gently.
Wrapping Up
Making Fluffy Japanese Cotton Cheesecake at home is not just about satisfying a sweet craving; it’s about the joy of creating something beautiful and delicious. So, roll up your sleeves, gather your ingredients, and embark on this delightful cooking adventure. You’re not just making a cake; you’re crafting a piece of culinary art that your friends and family will rave about. Enjoy making this airy, sumptuous dessert—you’ve got this!
Print
Fluffy Japanese Cotton Cheesecake
- Total Time: 170 minutes
- Yield: 6-8 servings 1x
- Diet: Vegetarian
Description
A light and airy cheesecake that’s as pleasing to the eye as it is to the palate, resembling a cloud with its silky smooth texture.
Ingredients
- 3 large eggs
- 200g cream cheese
- 50g unsalted butter
- 100ml milk
- 1/4 cup sugar
- 1/2 cup all-purpose flour
- 1 tablespoon cornstarch
- 1/4 teaspoon salt
- 1/4 teaspoon lemon juice
- Powdered sugar for dusting
Instructions
- Preheat the oven to 170°C (340°F) and prepare a 7-inch round cake pan by lining it with parchment paper.
- Melt the cream cheese and butter together over a water bath or in the microwave, stirring until smooth.
- Add the milk to the cream cheese mixture and mix well.
- Separate the egg whites and yolks. Stir the egg yolks into the cream cheese mixture one at a time, mixing thoroughly after each addition.
- Sift together the flour, cornstarch, and salt, then mix into the cream cheese mixture until smooth.
- Beat the egg whites with the lemon juice until soft peaks form. Gradually add the sugar and continue beating until stiff peaks form.
- Carefully fold the egg whites into the cream cheese batter in three increments.
- Pour the batter into the prepared cake pan and smooth the top.
- Place the cake pan in a larger baking dish and fill with hot water halfway up the sides of the cake pan.
- Bake for 25-30 minutes until the top is golden and a toothpick inserted comes out clean.
- Turn off the oven and leave the cake inside for an additional 15 minutes.
- Remove from the oven, let cool, and refrigerate for at least two hours before serving. Dust with powdered sugar before serving.
Notes
Serve with fruit compote or fresh berries. Can be frozen for up to a month.
- Prep Time: 20 minutes
- Cook Time: 30 minutes
- Category: Dessert
- Method: Baking
- Cuisine: Japanese
Nutrition
- Serving Size: 1 serving
- Calories: 210
- Sugar: 8g
- Sodium: 115mg
- Fat: 10g
- Saturated Fat: 4g
- Unsaturated Fat: 6g
- Trans Fat: 0g
- Carbohydrates: 24g
- Fiber: 0g
- Protein: 5g
- Cholesterol: 50mg