Ah, the allure of a homemade granola bar! It takes me back to my childhood days of rummaging through the kitchen, searching for a quick snack before heading back outside to play. But what’s a snack without kick-starting the day with something healthy and delicious? Whether it’s the crunch of nuts, the sweetness of honey, or the chewy fruit nestled in every bite, there’s something so satisfying about biting into a chewy homemade granola bar.
These bars have become my go-to snack for everything—from quick breakfasts on busy mornings to energy-boosting treats during long hikes. They’re easy to whip up, customizable to your liking, and packed with wholesome ingredients that make you feel good about eating them. Let’s create something nutritious together!
Recipe Timing
- Prep Duration: 10 minutes
- Active Cooking: 20 minutes
- Total Duration: 30 minutes
- Portion Size: Makes about 12 bars
- Complexity: Simple
Nutritional Recipe
- Calories per portion: Approximately 150 calories per bar
- Protein: 4 grams per serving
- Carbs: 21 grams per serving
- Fats: 6 grams per serving
- Fiber: 2 grams per serving
- Sugars: 5 grams per serving
- Sodium: 50 mg per serving
Why You’ll Love This Chewy Homemade Granola Bars
Imagine a world where you have a nutritious snack at your fingertips whenever you crave something sweet, chewy, and wholesome. These granola bars fit the bill. They’re not just easy to make; they turn out and taste much better than any store-bought option! Plus, you get to control the ingredients, making them as healthy or indulgent as you desire. They’re a wonderful canvas for other flavors too—how about dark chocolate chunks or coconut flakes if you’re feeling adventurous?
The Complete Cooking Journey
Making these granola bars is a delightful experience from start to finish. We start by combining the wholesome ingredients that make these bars truly special. Your kitchen will soon fill with the warm scents of toasting oats and melting nut butter—a key part of what makes homemade snacks so comforting.
Ingredients:
- 2 cups rolled oats
- 1/2 cup honey or maple syrup
- 1/2 cup peanut butter or almond butter
- 1/2 cup mixed nuts (chopped)
- 1/2 cup dried fruit (such as cranberries or raisins)
- 1/2 teaspoon vanilla extract
- 1/4 teaspoon salt
Method:
Step 1: Preheat the Oven
Preheat your oven to 350°F (175°C) and line an 8×8-inch baking dish with parchment paper. This will keep your granola bars from sticking!
Step 2: Mix Dry Ingredients
In a large bowl, mix together the rolled oats, salt, chopped nuts, and dried fruit. This step not only combines flavors but gets you excited for the magic that’s about to happen.
Step 3: Create the Wet Mixture
In a separate bowl, combine the honey (or maple syrup) and peanut butter, then heat gently until smooth. Stir in the vanilla extract. This luscious mixture is what binds your bars together!
Step 4: Combine Wet and Dry Ingredients
Pour the wet mixture over the dry ingredients and stir until everything is well combined. Make sure every oat and nut is coated in that sumptuous blend.
Step 5: Transfer to the Baking Dish
Transfer the mixture to the prepared baking dish and press down firmly to compact it. This helps the bars hold their shape when they cool!
Step 6: Bake to Perfection
Bake for 15-20 minutes or until the top is golden brown. The aroma will start to entice you, filling the air with delicious anticipation.
Step 7: Cool and Slice
Allow to cool completely before cutting into bars. Patience is key here, but trust me, it will be worth it when you finally taste them!
Serving Suggestions & Pairings
These chewy homemade granola bars are fantastic on their own but can be even more delightful when paired with a creamy yogurt or a fresh fruit salad. They also make a great addition to lunch boxes or as a portable snack for hiking or road trips.
Storage & Leftovers Guide
Store your granola bars in an airtight container at room temperature for up to one week. For longer storage, keep them in the refrigerator for up to two weeks, or freeze them for up to three months. Just be sure to separate them with parchment paper for easy grabbing!
Kitchen Wisdom & Success Tips
- Customization is Key: Feel free to swap out nuts, use different dried fruits, or add chocolate chips. The options are endless!
- Texture Preference: If you like a crunchier bar, bake them a little longer, or if you prefer them chewier, take them out early.
- Uniform Size: When cutting your bars, use a sharp knife and a ruler to measure for uniformity if you want them to look perfect.
- Taste Test: Always taste the mixture before going into the oven; if it’s not sweet enough, you can adjust with a bit more honey or maple syrup.
Flavor Variations & Adaptations
- Chocolate Lovers: Add cocoa powder to the dry mix for a chocolatey twist.
- Nut-Free Version: Substitute seed butter for nut butter and leave out nuts for a school-friendly treat.
- Tropical Delight: Include shredded coconut and dried pineapple for a tropical vibe.
Reader Questions & Solutions
-
What can I use instead of nuts?
- Try seeds like pumpkin or sunflower seeds or even oats for a nut-free version.
-
Can I make these vegan?
- Yes! Use maple syrup and almond butter to keep them vegan-friendly.
-
How do I prevent the bars from crumbling?
- Make sure to mash the mixture down firmly in the baking dish and allow them to cool completely before cutting.
-
Are there any allergy-friendly options?
- Absolutely! Use sunflower seed butter and ensure all ingredients are labeled as allergy-safe.
-
Can I add protein powder?
- Yes, you can mix in a scoop of your favorite protein powder into the dry mix for a protein boost!
Wrapping Up
There you have it—deliciously chewy homemade granola bars that are perfect for snacking, sharing, or even stashing away for those busy days. The beauty of this recipe lies in its simplicity and flexibility. So next time you’re in the kitchen, gather your ingredients and whip up a batch (or two!) of these nutritious delights. Remember, cooking is all about joy and creativity, so have fun with it!
Happy snacking!
Print
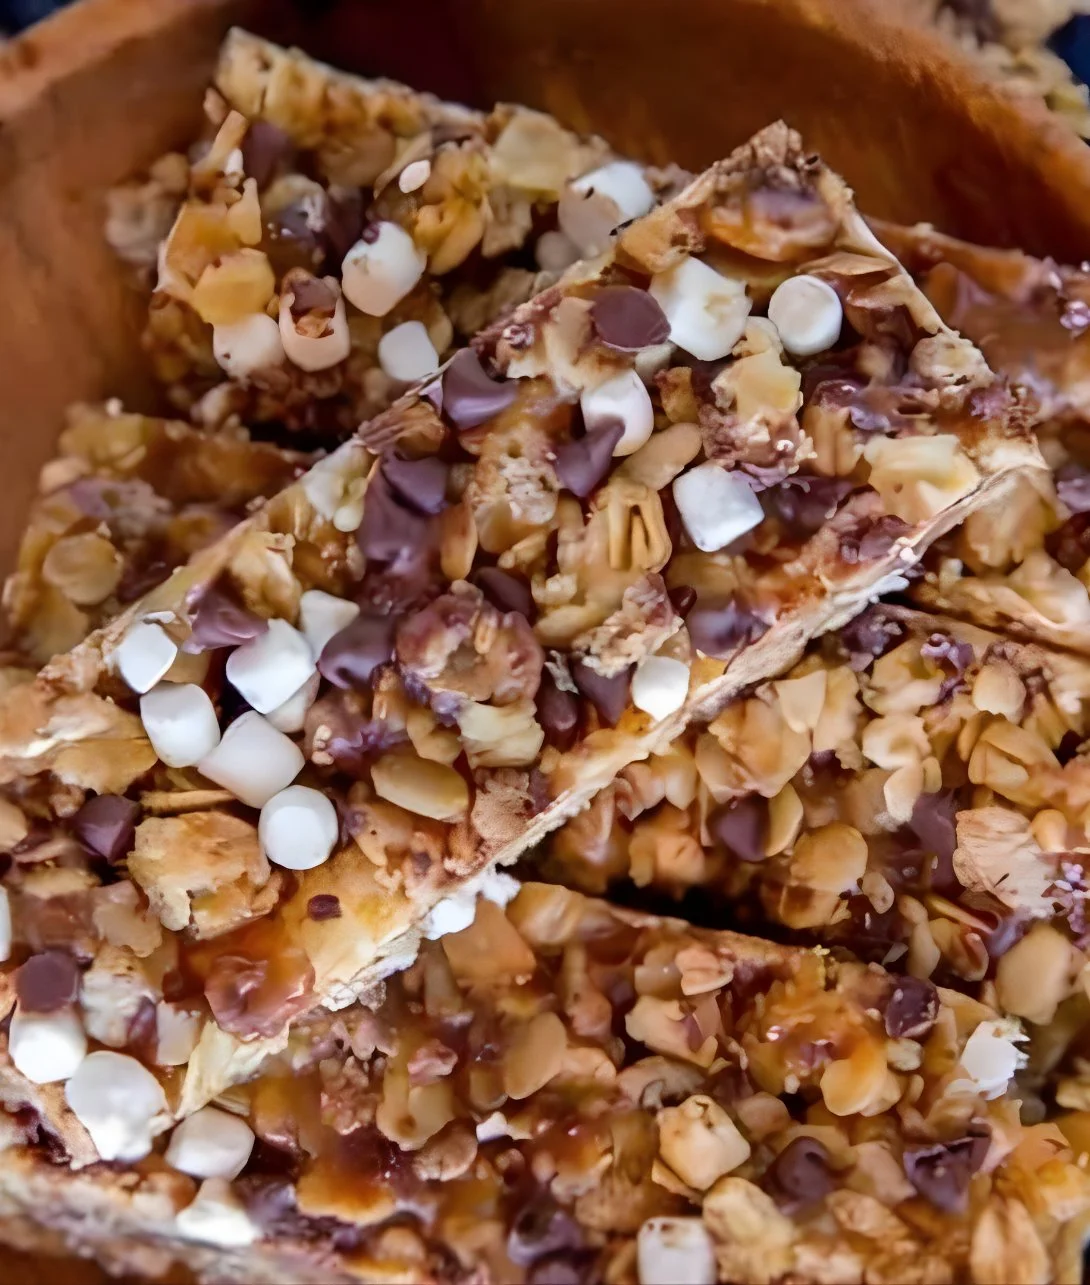
Chewy Homemade Granola Bars
- Total Time: 30 minutes
- Yield: 12 bars 1x
- Diet: Vegetarian
Description
Delicious and chewy homemade granola bars packed with wholesome ingredients, perfect for snacks or quick breakfasts.
Ingredients
- 2 cups rolled oats
- 1/2 cup honey or maple syrup
- 1/2 cup peanut butter or almond butter
- 1/2 cup mixed nuts (chopped)
- 1/2 cup dried fruit (such as cranberries or raisins)
- 1/2 teaspoon vanilla extract
- 1/4 teaspoon salt
Instructions
- Preheat your oven to 350°F (175°C) and line an 8×8-inch baking dish with parchment paper.
- In a large bowl, mix together the rolled oats, salt, chopped nuts, and dried fruit.
- In a separate bowl, combine the honey (or maple syrup) and peanut butter, then heat gently until smooth. Stir in the vanilla extract.
- Pour the wet mixture over the dry ingredients and stir until well combined.
- Transfer the mixture to the prepared baking dish and press down firmly to compact it.
- Bake for 15-20 minutes or until the top is golden brown.
- Allow to cool completely before cutting into bars.
Notes
Customize with different nuts or dried fruits. Store in an airtight container.
- Prep Time: 10 minutes
- Cook Time: 20 minutes
- Category: Snack
- Method: Baking
- Cuisine: American
Nutrition
- Serving Size: 1 bar
- Calories: 150
- Sugar: 5g
- Sodium: 50mg
- Fat: 6g
- Saturated Fat: 1g
- Unsaturated Fat: 5g
- Trans Fat: 0g
- Carbohydrates: 21g
- Fiber: 2g
- Protein: 4g
- Cholesterol: 0mg